User Group List screen
On the user group list screen, the user can see all the user groups of the applications in the system and the status of them. Users can add, edit or delete these user groups from system.
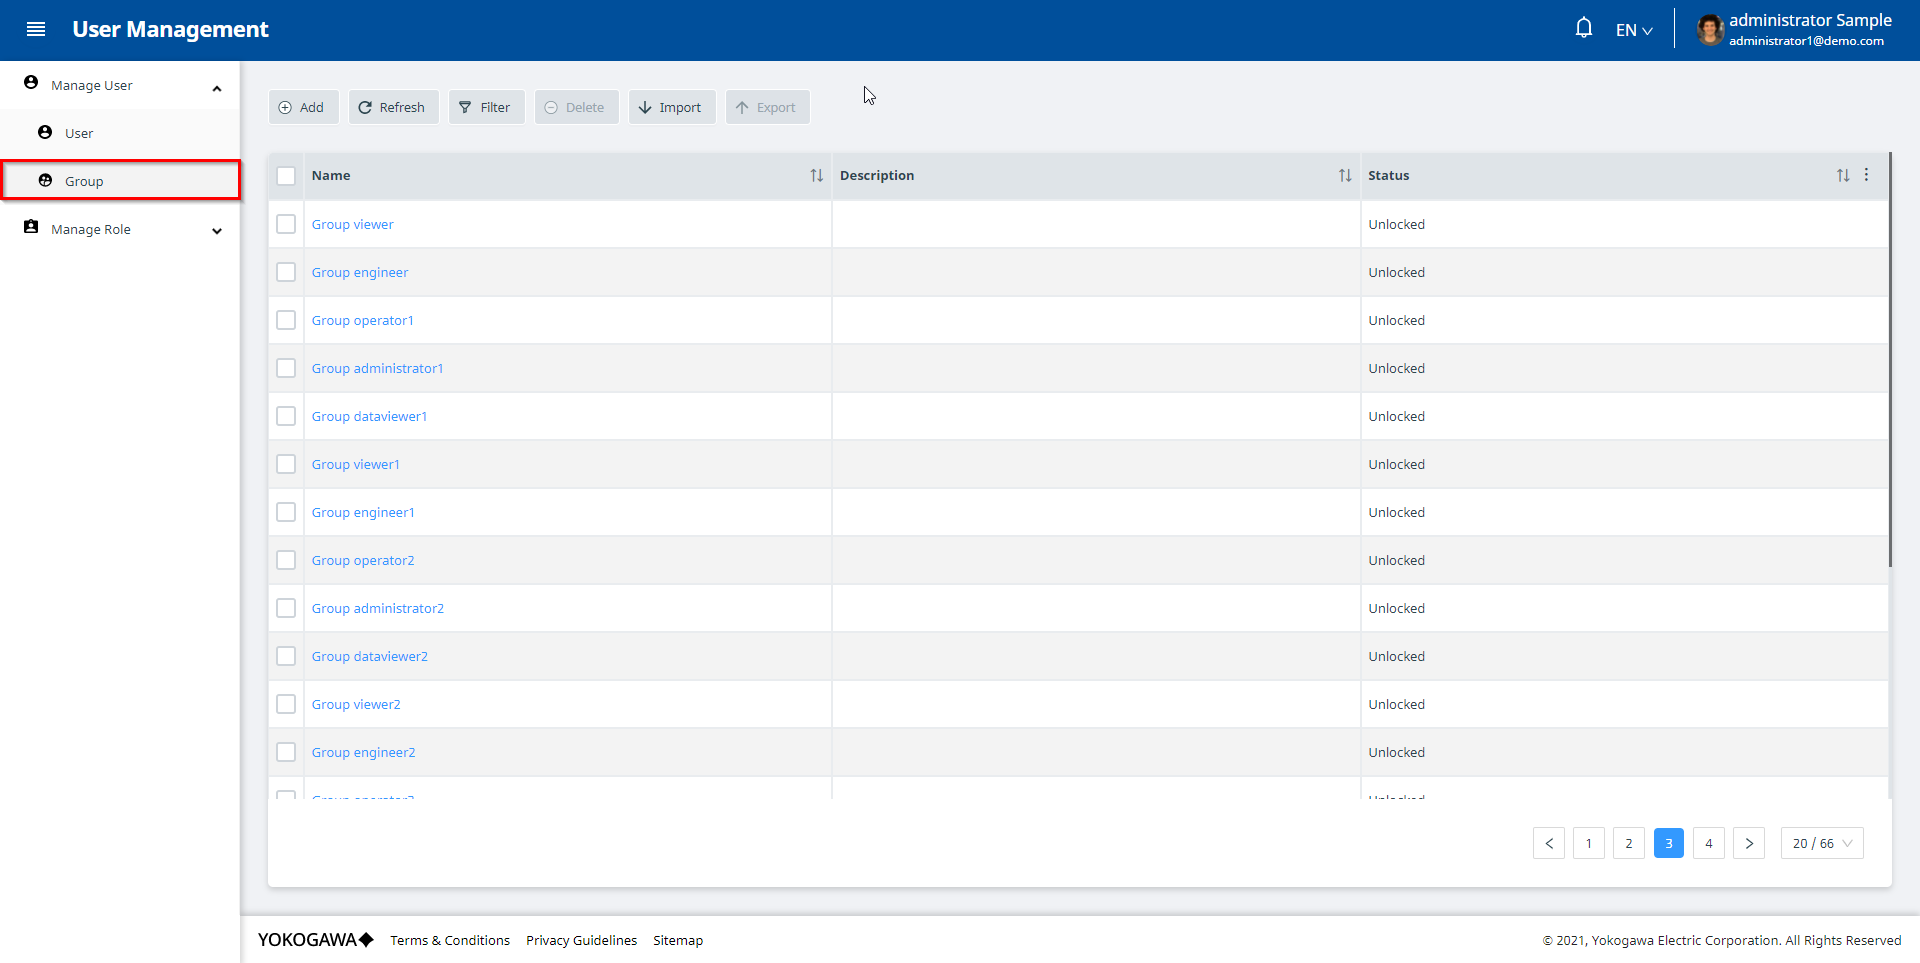
To add a new user group, the user clicks the Add button to go to the Add User Group screen. The Add User Group screen consists of three tabs: The Profile tab, the User tab and the Application tab.
- Profile tab: Display the basic information of the user including: First name, last name, user type and other information corresponding to each type.
- User Group tab: Displays the user groups this user is added to
- Application tab: Displays applications to which this user is added to
To create a user group, the user only needs to enter the required information at the Profile tab, other tabs can be added or not.
Profile tab
On the Profile tab, the user must enter Name of group. Besides, user can enter Description of user group if necessary and change state of Lock toggle to lock/unlock.
If the user group is locked, the all users of this user group will not be able to login to the system.
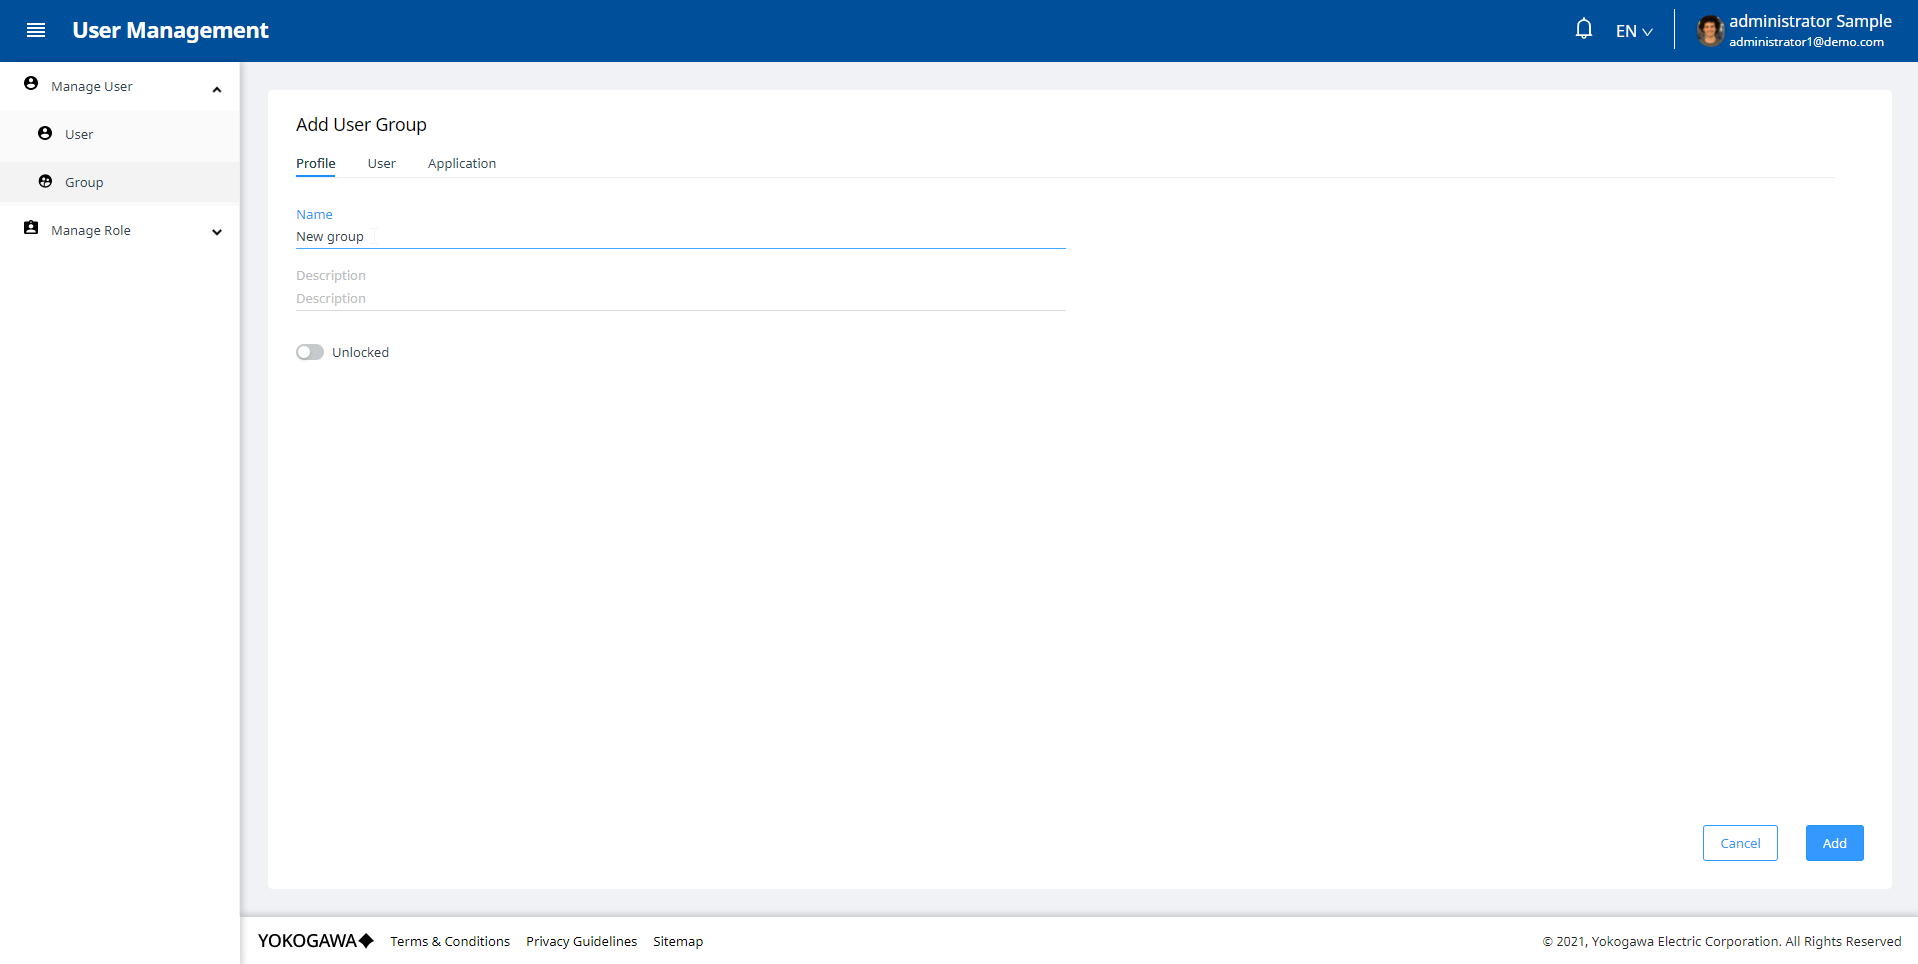
In addition, if the user group is locked, all users of this group is locked and the Lock toggle in the User's Profile tab will be disabled and changed to the Locked state.
User tab
The User tab displays all the User which is assigned to this User Group. A user user group may not have any user or have one or more ones.
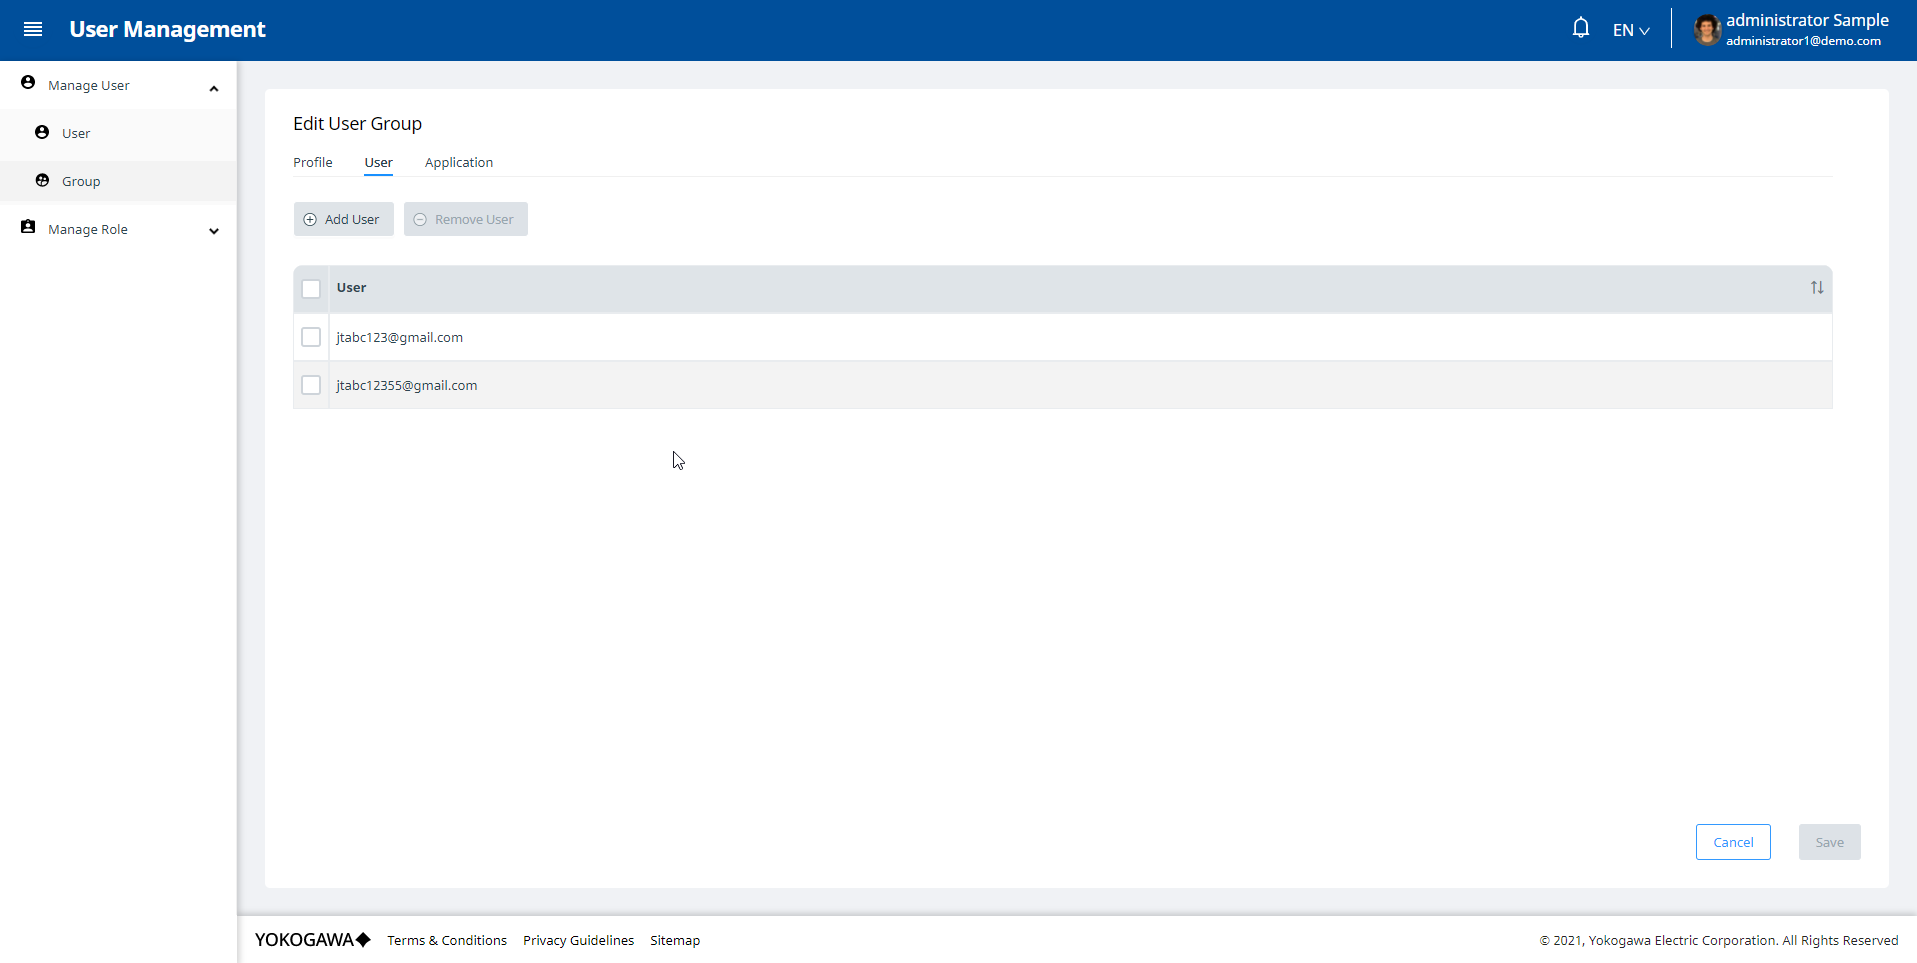
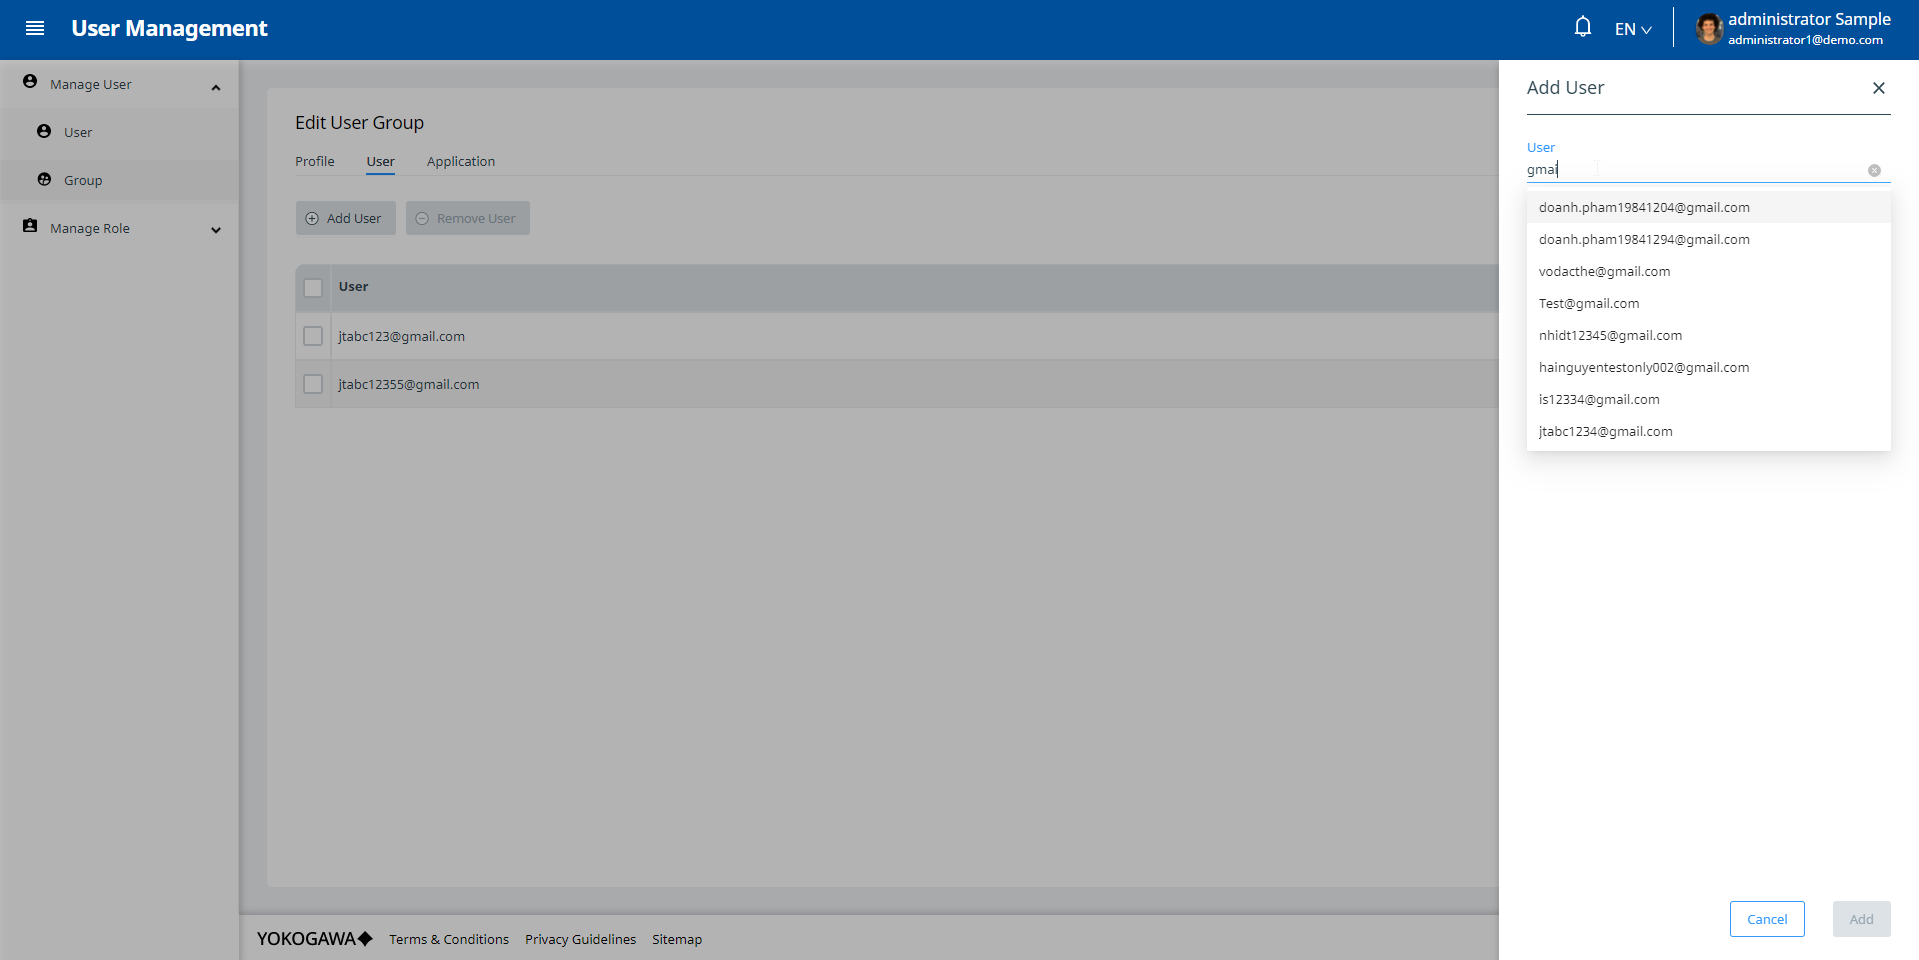
To add a User, the user clicks the Add button to open the Add User modal. Then the user selects a User UPN that has not been added to the User tab and clicks the Add button. Then, the newly added User will be displayed on the User list.
Application tab
The Application tab displays all the applications which this user group is assigned to. A user group may not be assigned to a application or assigned to one or more ones. User Groups are assigned to an application in at least one role. In addition, user groups can be added to an application with multiple roles.
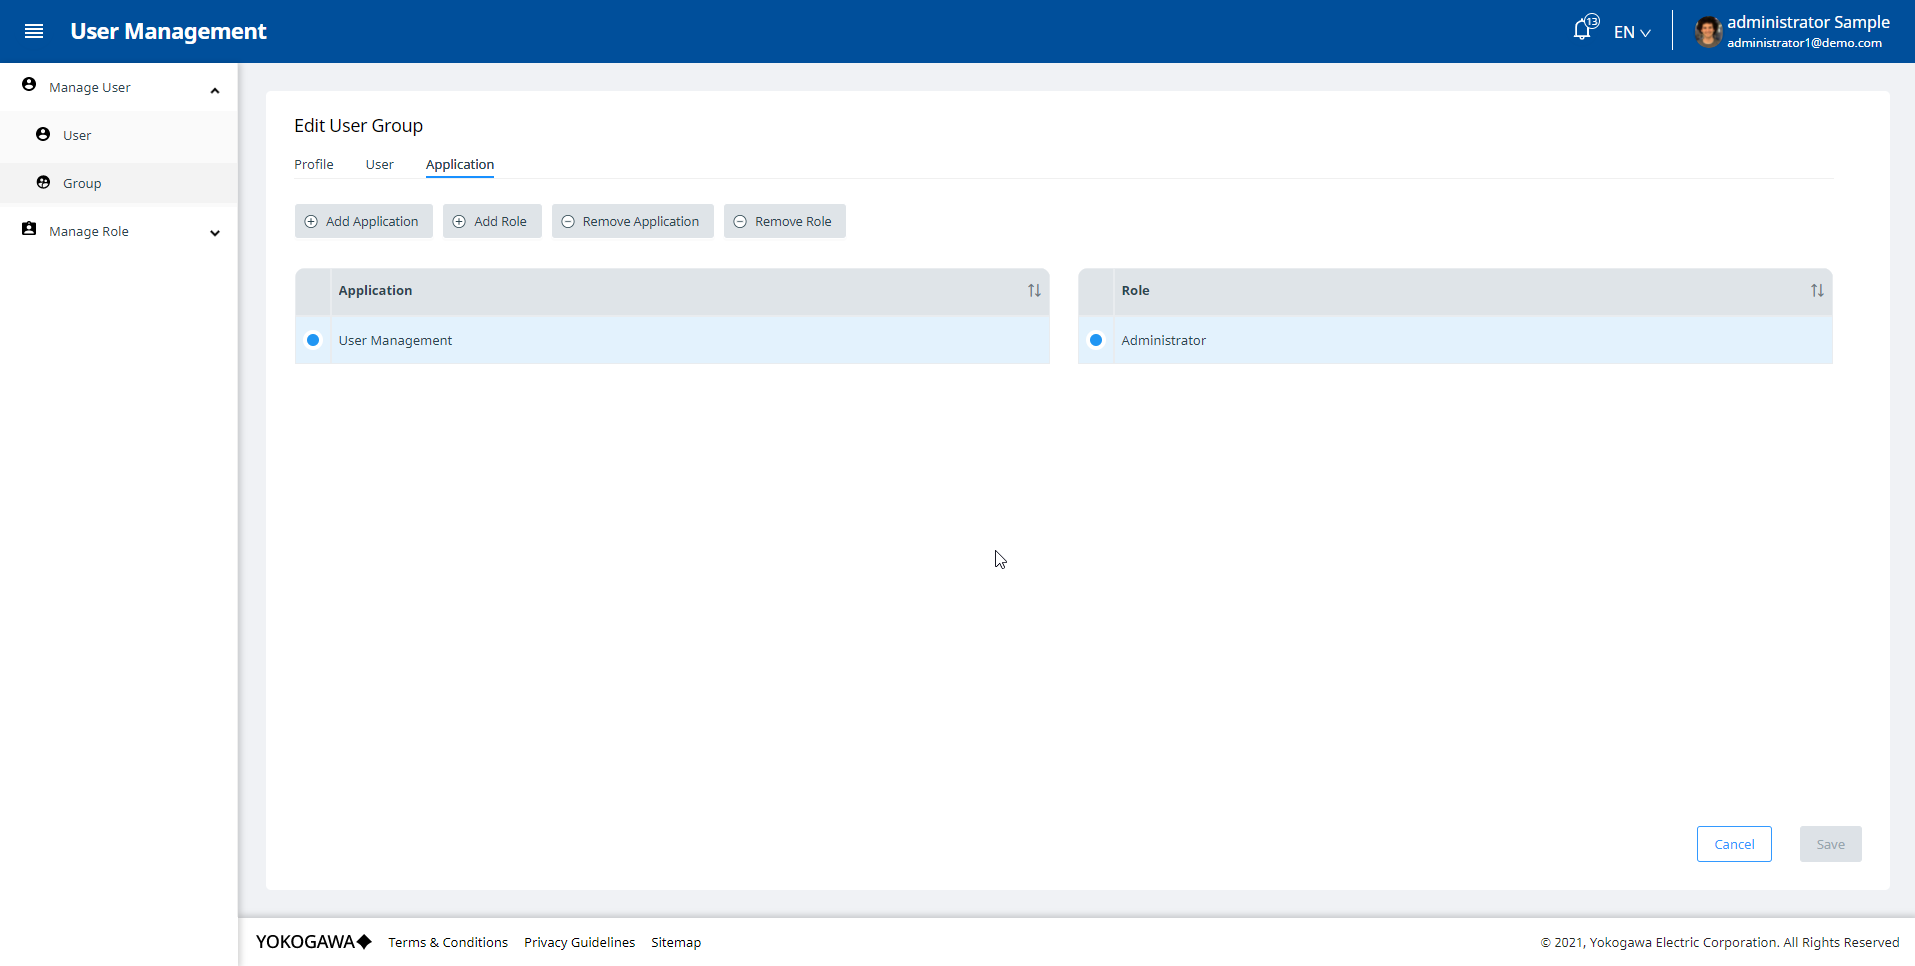
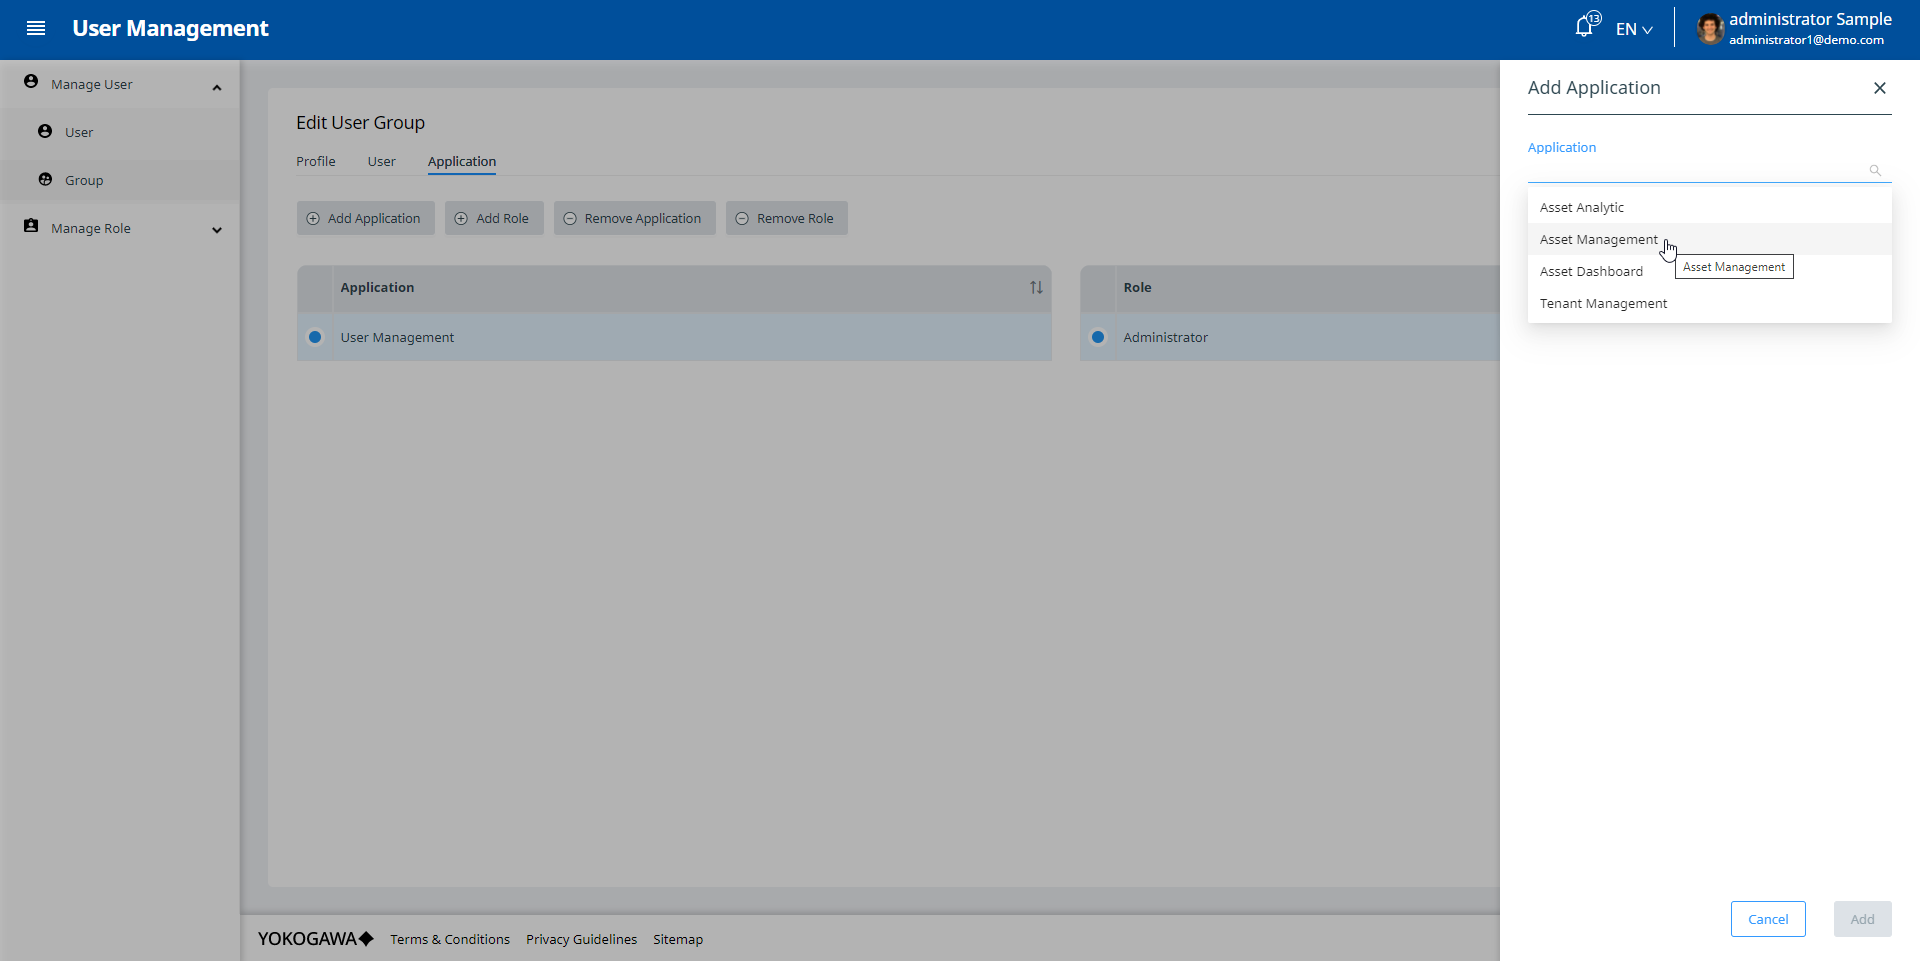
To add a Application, the user clicks the Add Application button to open the Add Application modal. Then the user selects a Application that has not been added to the Application tab and clicks the Add button. Then, the newly added Application will be displayed on the Application list.
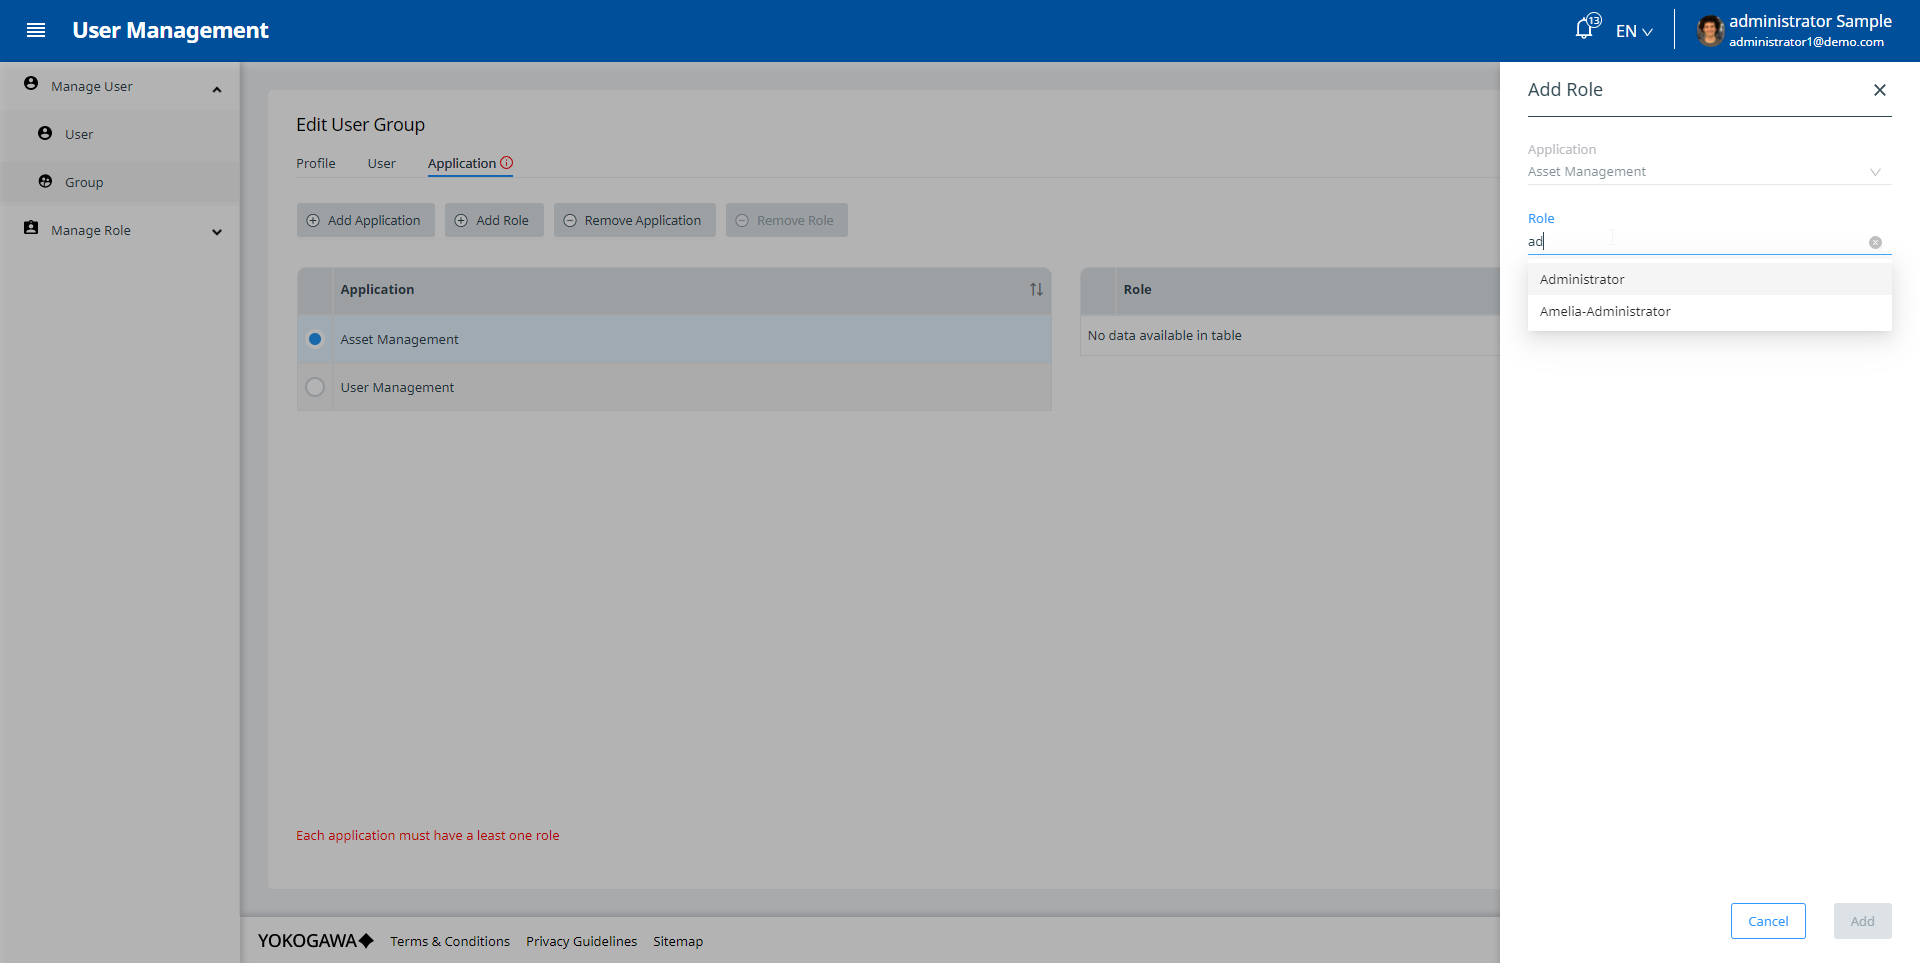
Next, the user then needs to select a role by clicking the Add Role button to open the Add Role modal. Then the user selects a Role of selected Application that has not been added to the Role list of Application tab and clicks the Add button. Then, the newly added Role will be displayed on the Role list.
After selecting the role, for most applications except User Management and Tenant Management applictions, it is necessary to determine the Projects that the user is allowed to access. By default the user will be allowed to access all projects. However, the user can also select option: "Assign to some projects" and select at least one project to allow the user to access the selected projects only.
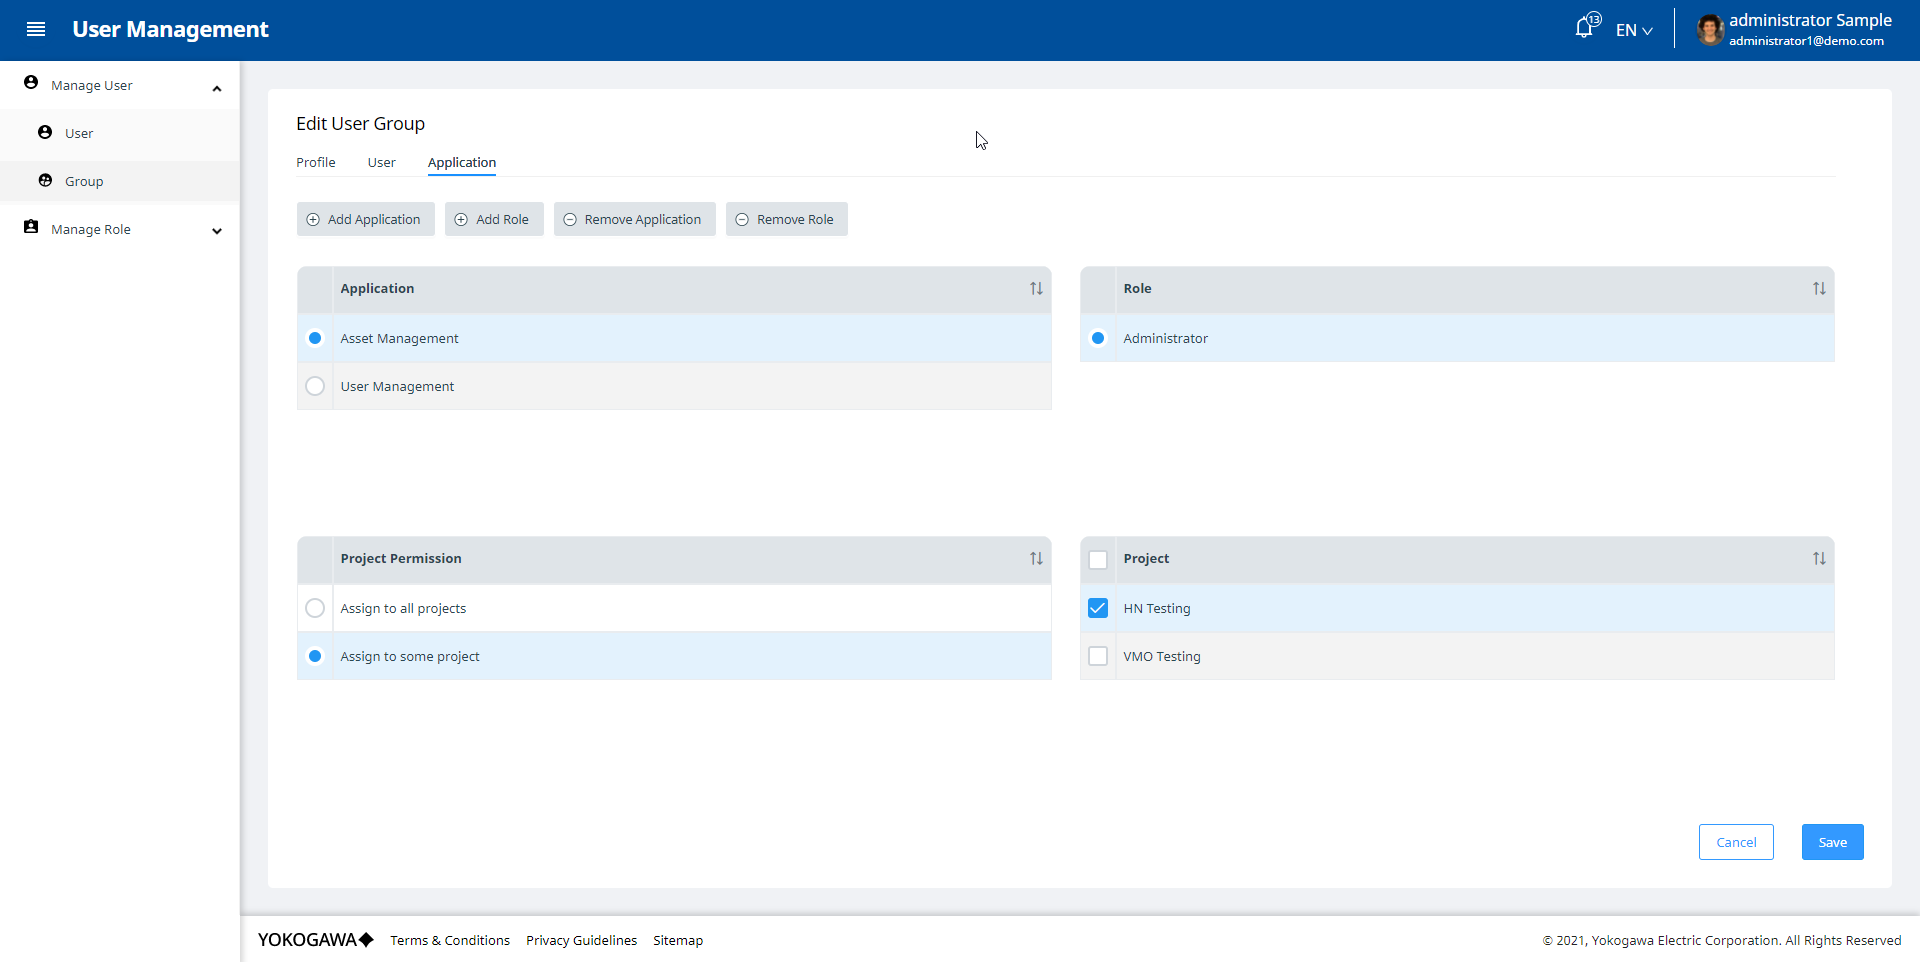
User Groups with Project permission is: "Assign to all projects" are the default user groups in the projects of the respective applications.